How to: Postman tests HTML report to Microsoft Teams with Gitlab CI/CD
This is my first post of a technical nature, am I devloper now?
Goal: Run your Postman tests, create an HTML report and post that to Microsoft Teams all in Gitlab CI/CD.
What you need:
- an Online Postman Workspace (might required paid version, idk). This means all version control is in Postman and you can connect to it because it is in the cloud.
- Gitlab CI/CD + a Project you want the tests to run in (I created a new project specially for these tests, it just has the yml file)
- Microsoft Teams with enough rights to create a webhook for incoming messages.
Implicit knowledge:
- general knowledge of how Postman works (Collections, Environments)
- a bit of knowledge how to use .yml files
- you know your general way in Gitlab
Steps
Postman steps
Create a Postman API key and store it somewhere safe. Password managers ftw, is my tip.
Look up the collection UUID you want to run in the CI/CD like this https://api.getpostman.com/collections?apikey={your_api_key}. Save the correct collection URL somewhere (you need to use it later). Example of a collection URL: https://api.getpostman.com/collections/{collection-UUID}?apikey={your_api_key}
Also look up the Environment UUID you want to run the tests against, like so: https://api.getpostman.com/environments?apikey={your_api_key} and grab the correct UUID and save the Environment URL: https://api.getpostman.com/environments/{environment-uuid}?apikey={your_api_key}
Have all this information somewhere handy: the API key, all the URL’s you looked up. Remember, this whole thing requires you to have a Postman Online Collection, not a local Postman + git setup.
Gitlab steps
I chose to have a seperate Gitlab project to run these tests in, so I created that and the only file it has is a YML file.
Create a blank project with the name you desire and then go to the CI/CD part in Gitlab for this project. Generate a YML file from a template, doesn’t really matter which one we’re going to change it anyway.
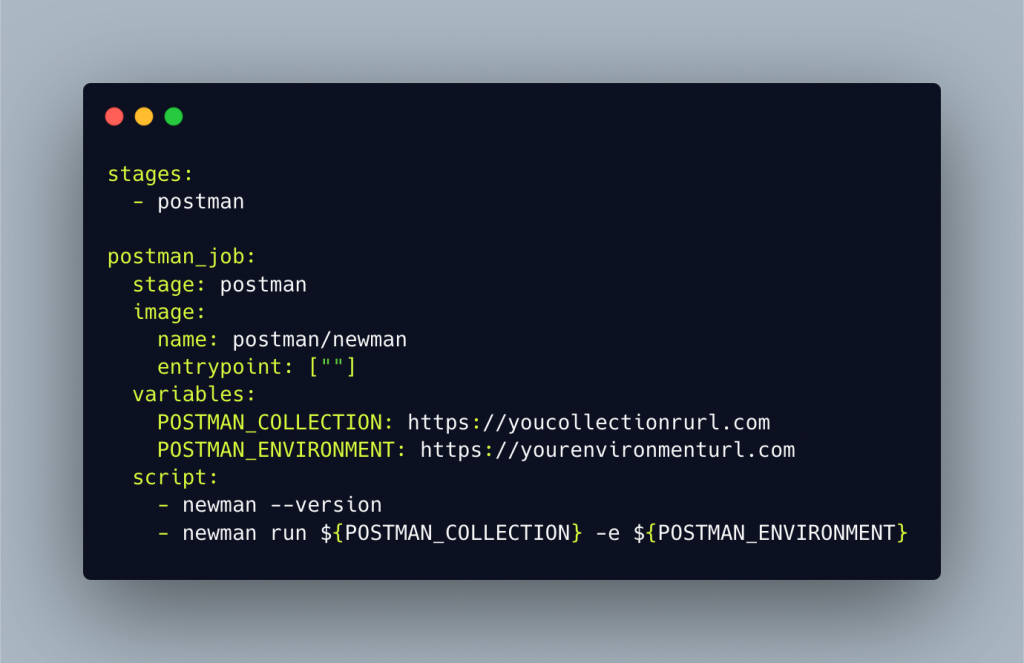
Use this as the base:

stages:
  - postman

postman_job:
  stage: postman
  image:
    name: postman/newman
    entrypoint: [""]
  variables:
    POSTMAN_COLLECTION: https://yourcollectionurl.com
    POSTMAN_ENVIRONMENT: https://yourenvironmenturl.com
  script:
    - newman --version
    - newman run ${POSTMAN_COLLECTION} -e ${POSTMAN_ENVIRONMENT}
Take note, as this code snippet needs a little customisation! At the variables, paste the URL’s you saved earlier from postman. Be really careful as YML is really strict. Use 1 space after the : and paste the URL there.
At this point, the pipeline should be able to run, albeit manually. This doesn’t generate a HTML report yet, just runs the tests.
Microsoft Teams steps
You need to have sufficient rights in MS Team to do this, hopefully this poses no problem for you.
Follow this Gitlab guide to create a Webhook for MS Teams and store it somewhere safe again. You can skip the part about “configure your gitlab project” as I’ll show you a solution fully in the YML file. You don’t need to do config in Gitlab itself with this webhook, so just store the Webhook URL. Think about which MS Teams Channel you want the HTML report to end up in. Also, please consider that during this setup there will be a lot of spam in the Teams channel you choose, I created a Test Channel to use during this setup to not bother my colleagues too much. Don’t forget to change this back after the setup works!
We’ll also create a formatted card to show in Teams. Mine looks like this, pretty basic.

You can use this guide to create your own card, or copy my cURL in case you just want to copy my card.
The part I struggled with was to put the cURL I created with the MS Teams card in the correct format that was valid YML. YML is sooooo strict! You can copy this next code snippet and change the parts that you want. This StackOverflow post helped me.
after_script:
    - |
      curl -H "Content-Type: application/json" -d "{ \"@type\": \"MessageCard\", \"@context\": \"http://schema.org/extensions\", \"themeColor\": \"fd7e14\", \"summary\": \"Postman API run: ${CI_JOB_STATUS}\", \"sections\": [{ \"activityTitle\": \"Postman API run: ${CI_JOB_STATUS}\", \"markdown\": true }], \"potentialAction\": [{ \"@type\": \"OpenUri\", \"name\": \"View HTML report\", \"targets\": [{ \"os\": \"default\", \"uri\": \"https://${CI_PROJECT_NAMESPACE}.gitlab.io/-/${CI_PROJECT_NAME}/-/jobs/${CI_JOB_ID}/artifacts/${FILENAME}\" }] }] }" ${WEBHOOK}
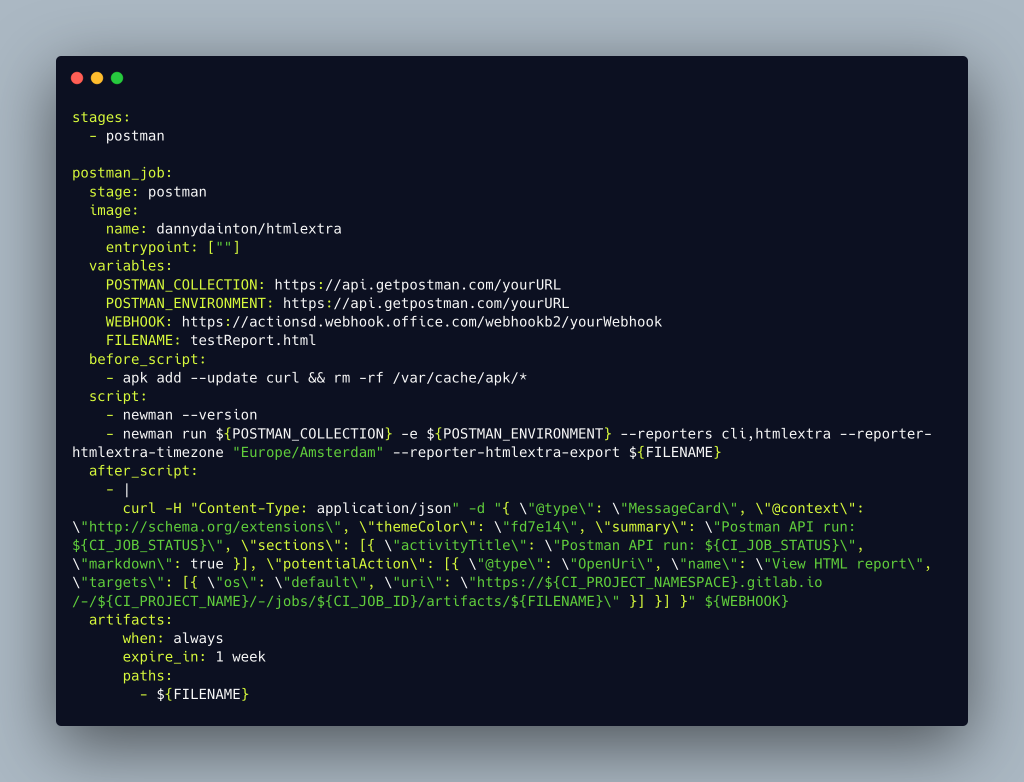
In the below picture you see how it all fits together in the YML file, including the HTML Extra report. Take note of the timezone in the Newman Run step (I chose Amsterdam, change it to your needs). Also take note in the artifact step that I let them expire in 1 week. Change that to your needs.

stages:
  - postman

postman_job:
  stage: postman
  image:
    name: dannydainton/htmlextra
    entrypoint: [""]
  variables:
    POSTMAN_COLLECTION: url
    POSTMAN_ENVIRONMENT: url
    WEBHOOK: url
    FILENAME: testReport.html
  before_script:
    - apk add --update curl && rm -rf /var/cache/apk/*
  script:
    - newman --version
    - newman run ${POSTMAN_COLLECTION} -e ${POSTMAN_ENVIRONMENT} --reporters cli,htmlextra --reporter-htmlextra-timezone "Europe/Amsterdam" --reporter-htmlextra-export ${FILENAME}
  after_script:
    - |
      curl -H "Content-Type: application/json" -d "{ \"@type\": \"MessageCard\", \"@context\": \"http://schema.org/extensions\", \"themeColor\": \"fd7e14\", \"summary\": \"Postman API run: ${CI_JOB_STATUS}\", \"sections\": [{ \"activityTitle\": \"Postman API run: ${CI_JOB_STATUS}\", \"markdown\": true }], \"potentialAction\": [{ \"@type\": \"OpenUri\", \"name\": \"View HTML report\", \"targets\": [{ \"os\": \"default\", \"uri\": \"https://${CI_PROJECT_NAMESPACE}.gitlab.io/-/${CI_PROJECT_NAME}/-/jobs/${CI_JOB_ID}/artifacts/${FILENAME}\" }] }] }" ${WEBHOOK}
  artifacts:
      when: always
      expire_in: 1 week
      paths:
        - ${FILENAME}
If you’re puzzled about some variables in the cURL like ${CI_JOB_STATUS}, these are predifined variables that Gitlab offers. Read more about that here. Also, this way of running the CI Job is using the Docker image that Danny Dainton has created (dannydainton/htmlextra). Sadly, we need to install cURL in the before_script step or else our whole setup won’t work.
You can of course customise this way more, but I kept it simple for now. I’m a complete newbie when it comes to CI/CD so I was already quite happy to have this up and running. It serves my needs for now.
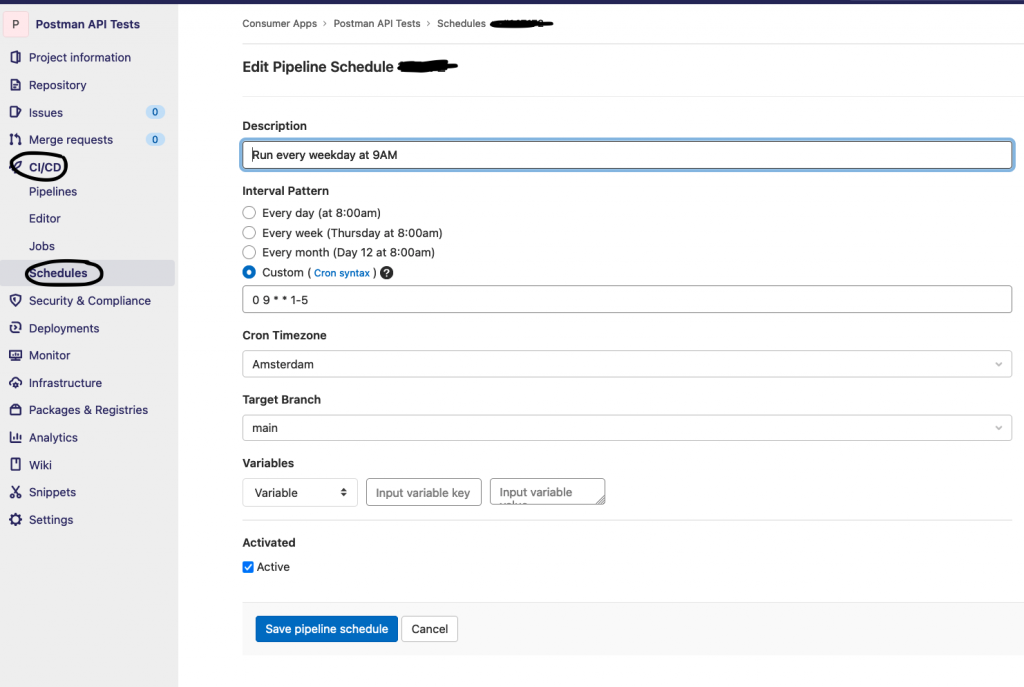
The last step is how often you want this to run. For me, I just want the tests to run once a day on weekdays in the morning so I created a Cron rule in Gitlab like so. So if you wanna get really pedantic, this isn’t CI/CD because it isn’t triggered by commits, but please spare me the discussion. This serves my needs and that’s all I care about.

So, if all went well your commit with the YML file Gitlab triggered a run of the pipeline and you should see something appear in MS Teams (the channel you chose).

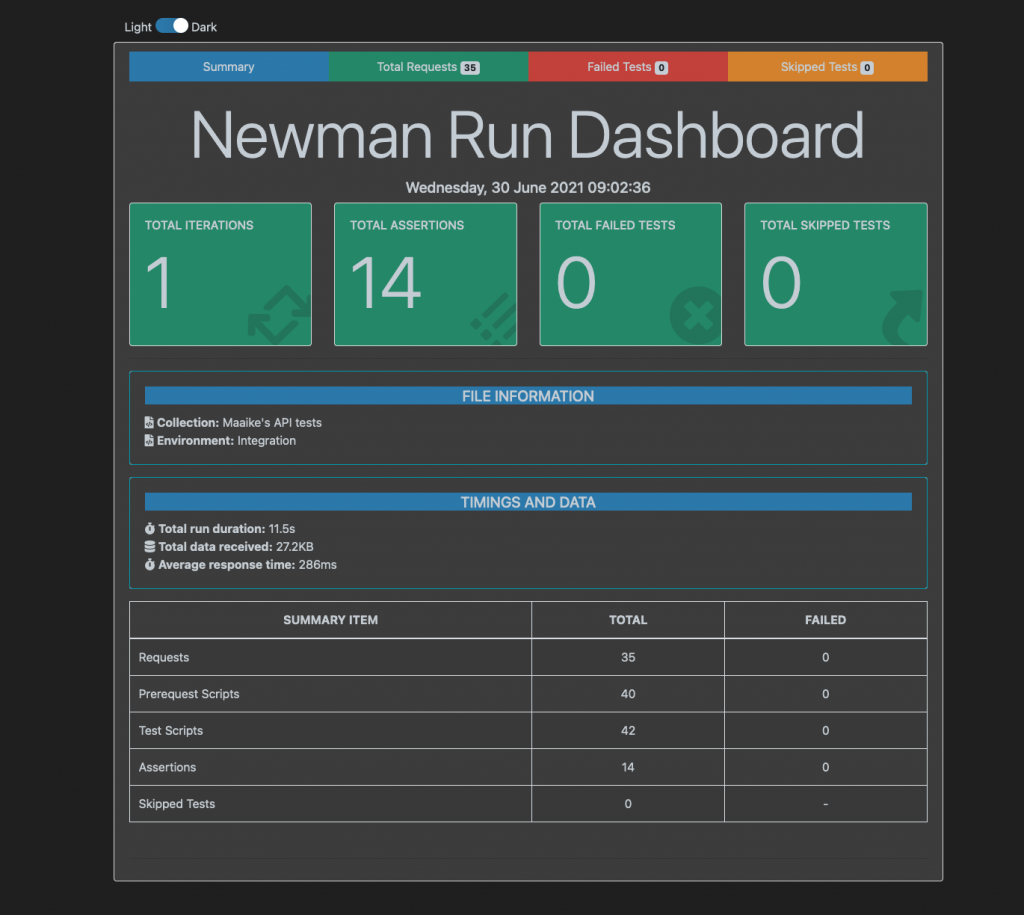
When you click on “View HTML report” you should see something like this:

I hope this was helpful to you. This was my first experience setting up a CI/CD pipeline in Gitlab and using YML and it wasn’t really pleasant. At one point I had a space in my YML file and it won’t work that way, took me a while to spot that lol.


Comments ()